Step back in time to the comforting aroma of grandma's kitchen, where holiday treats were crafted with love and a touch of magic. But forget the hours of stirring over a hot stove and the need for a precise candy thermometer. Today, we're rediscovering a beloved classic with a modern twist: the easy peanut butter fudge recipe that requires just two ingredients and a microwave. This isn't just any homemade fudge; it's a quick, retro delight designed for today's busy world, delivering rich, creamy perfection in minutes.
For many, peanut butter fudge evokes cherished memories of childhood holidays. The dense, sweet, and nutty squares were a staple, a simple pleasure that felt incredibly indulgent. While the exact recipes might be lost to time, the essence of that nostalgic sweetness remains. This 2-ingredient microwave rendition captures that very spirit, making it accessible to even the most novice of home cooks. It’s the perfect solution for satisfying a sudden sweet craving, whipping up a last-minute party treat, or simply creating new, delicious memories with your own loved ones.
The Magic of 2-Ingredient Peanut Butter Fudge
Imagine a dessert that conjures up warm, fuzzy feelings of yesteryear, yet can be prepared in under ten minutes. That's the undeniable charm of this incredible peanut butter fudge recipe. Unlike traditional fudge, which often demands meticulous temperature control and constant attention, this microwave marvel simplifies the entire process without sacrificing a shred of flavor or texture. It’s the kind of recipe that makes you feel like a culinary wizard, turning humble pantry staples into a show-stopping confection with minimal effort.
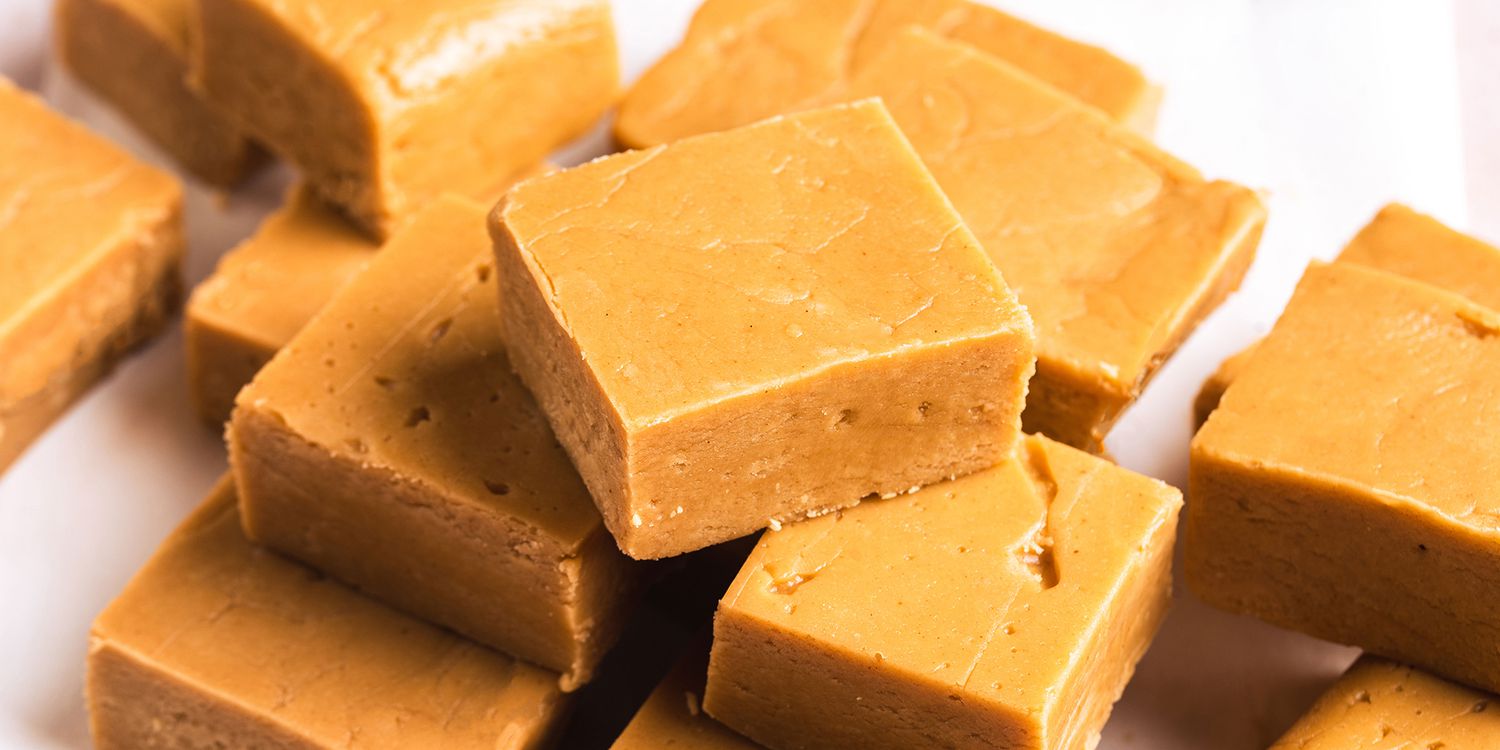
The beauty lies in its elegant simplicity. There's no need for a candy thermometer, no risks associated with working with boiling sugar, and no complicated steps to follow. This makes it an ideal project for budding young bakers eager to help in the kitchen, or for adults who crave homemade goodness without the fuss. The resulting fudge is wonderfully rich and unbelievably creamy, melting seamlessly across your taste buds with remarkable smoothness. Decadent sweet notes dance alongside subtle nutty undertones, creating a sensational confection that feels both nostalgic and utterly indulgent. It embodies the comfort and celebration wrapped into one delightful package, proving that sometimes, the simplest recipes yield the most extraordinary results.
Why This Microwave Fudge is a Modern Classic
In a world where time is a precious commodity, this quick peanut butter fudge recipe stands out as a genuine culinary hero. Its rapid preparation and minimal chill time mean you can go from craving to confection in just over an hour. This isn't just convenient; it's a game-changer for spontaneous gatherings, last-minute bake sales, or simply treating yourself after a long day.
Unrivaled Speed and Simplicity
- Lightning-Fast Prep: With only two key ingredients and the microwave doing most of the work, you’ll spend less than 10 minutes actively preparing this treat. This is significantly faster than many traditional fudge recipes that can demand 30 minutes or more of hands-on cooking time.
- Effortless Technique: Forget the fear of sugar crystallization or undercooked fudge. The microwave method ensures a gentle, even melt, making it virtually foolproof. Simply combine, heat, stir, and chill.
- Minimal Cleanup: Using a microwave-safe bowl and a single pan for chilling means less time scrubbing and more time enjoying your delicious creation.
Creamy Perfection Without the Fuss
The secret to this fudge's incredible texture lies in the ingenious combination of creamy peanut butter and ready-made frosting. The frosting, essentially a pre-whipped blend of sugar, fat, and flavor, acts as the perfect binding agent and sweetener, eliminating the need for separate sugar, butter, and milk typically found in more complex recipes like the classic Paula Deen peanut butter fudge. The result is an incredibly smooth, velvety fudge that maintains its decadent mouthfeel, even when enjoyed straight from the fridge.
A Bridge to Nostalgia
There's something inherently comforting about homemade fudge. This recipe rekindles those warm, nostalgic feelings associated with holiday baking and family traditions. It's an accessible way to recreate those treasured memories, or to start new ones with your own family, proving that sweet, nostalgic happiness is achievable with minimal cooking skills required. It allows kitchen novices and experienced bakers alike to craft an impressive treat that tastes like it came from a professional bakery, solidifying your status as everyone's favorite dessert maker.
Mastering the 2-Ingredient Peanut Butter Fudge Recipe
The beauty of this particular peanut butter fudge recipe lies in its straightforward nature, but understanding the key components and a few tricks can elevate your results from great to utterly sublime. Precision in ingredient selection and a gentle hand in preparation are all you need.
The Unsung Heroes: Key Ingredients
- No-Stir Creamy Peanut Butter: This is non-negotiable for success. You'll need one 15-ounce container. Brands like Jif, Skippy, or Peter Pan work perfectly. The "no-stir" designation indicates that the oils are emulsified, preventing separation and ensuring a consistently smooth texture, which is crucial for fudge that sets properly. Natural peanut butters that require stirring often have varying oil content and can yield a greasy or crumbly fudge. Stick to the classic creamy varieties for that rich, uniform consistency.
- Vanilla Frosting: Grab one 16-ounce container of creamy vanilla frosting. The choice of flavor here is important – vanilla provides a neutral yet sweet base that complements the peanut butter beautifully. While you can experiment with French vanilla or even cream cheese frosting for subtle variations, it's vital to steer clear of "whipped" varieties. Whipped frostings contain too much air and moisture, which can prevent your fudge from setting correctly and result in a less dense, almost fluffy texture that isn't true to traditional fudge. The high sugar content in standard creamy frosting is what helps the fudge firm up.
The Effortless Process: Simply Microwave and Mix
- Prepare Your Pan: Lightly spray an 8x8 or 9x9-inch square baking pan with nonstick cooking spray, or line it with parchment paper for easy removal. This step is crucial for ensuring your fudge releases cleanly once chilled.
- Combine Ingredients: Scoop the entire container of peanut butter and the entire container of vanilla frosting into a large, microwave-safe bowl.
- Microwave with Care: Heat the mixture in the microwave in 30-second intervals, stirring well after each interval. The goal is to melt the frosting and warm the peanut butter until the mixture is smooth and fully combined, not to cook it. This usually takes 1.5 to 2.5 minutes, depending on your microwave's wattage.
- Stir Until Silky: Once melted, stir vigorously with a spatula or spoon until the mixture is completely smooth, homogenous, and glossy. There should be no streaks of unmixed frosting or peanut butter. This thorough stirring is key to achieving that velvety texture.
- Pour and Chill: Pour the hot fudge mixture into your prepared pan, spreading it evenly with the spatula. Place the pan in the refrigerator for at least one hour, or until the fudge is firm.
- Cut and Serve: Once set, lift the fudge out of the pan using the parchment paper (if used) or carefully cut into squares directly in the pan.
Pro Tips for Creamy Perfection
- Don't Overheat: Overheating can cause the peanut butter to separate or the sugar in the frosting to seize, leading to a grainy texture. Heat just until melted enough to stir smoothly.
- Stir Thoroughly: Vigorous stirring ensures all ingredients are fully incorporated, which is essential for a uniform and smooth fudge. Keep stirring until the mixture is truly glossy.
- Chill Completely: Resist the temptation to cut the fudge before it's fully firm. An hour is usually sufficient, but longer won't hurt. A well-chilled fudge holds its shape better and offers a superior eating experience.
- Room Temperature Ingredients: While not strictly necessary, allowing your peanut butter and frosting to come closer to room temperature can help them combine more easily in the microwave.
Elevate Your Fudge: Customization and Serving Suggestions
While this 2-ingredient peanut butter fudge recipe is delightful in its pure form, it also serves as a fantastic canvas for creative customization. Adding a few extra touches can transform this simple treat into something truly extraordinary, perfect for any occasion.
Beyond the Basic: Exciting Add-Ins and Toppings
- Chop It Up: Fold in a handful of chopped peanuts, pecans, or walnuts into the mixture before chilling for an added textural contrast and intensified nutty flavor. This is a classic enhancement that many adore.
- Chocolate Lover's Dream: Drizzle melted chocolate (milk, dark, or white) over the set fudge for a beautiful presentation and an extra layer of decadence. A sprinkle of mini chocolate chips mixed into the fudge itself can also be delightful.
- A Touch of Salt: A sprinkle of flaky sea salt over the top before chilling can beautifully balance the sweetness and enhance the peanut butter flavor, offering a gourmet touch.
- Flavor Play: While vanilla frosting is recommended for the base, don't be afraid to experiment with other frosting flavors that pair well with peanut butter, such as chocolate frosting for a "buckeye" inspired fudge, or even a caramel swirl. Just remember to avoid whipped varieties.
- Sprinkle Some Fun: For holiday themes or birthday celebrations, a shower of colorful sprinkles before the fudge sets can make it extra festive and appealing, especially for kids.
Serving with Style
This microwave peanut butter fudge is incredibly versatile. It’s perfect for:
- Dessert Platters: Arrange fudge squares alongside cookies, brownies, and other confections for an impressive spread.
- Homemade Gifts: Package individual squares in cellophane bags or small decorative boxes for thoughtful, edible gifts during the holidays or as hostess presents.
- Coffee & Tea Companion: A small square of this rich fudge pairs wonderfully with a warm cup of coffee or tea, offering a moment of pure bliss.
Storage and Freshness
Store your homemade peanut butter fudge in an airtight container in the refrigerator for up to 2-3 weeks. It tastes fantastic straight from the fridge and holds its shape beautifully. For longer storage, you can freeze individual pieces for up to 2-3 months; just thaw them in the refrigerator before serving.
Whether you're exploring the world of homemade candy for the first time or simply seeking a quick and satisfying dessert, this peanut butter fudge recipe is a must-try. It combines speed, simplicity, and irresistible flavor, making it a truly timeless treat.
Conclusion
The 2-ingredient peanut butter fudge recipe is more than just a quick dessert; it's a testament to the power of simplicity and the enduring appeal of homemade treats. It seamlessly blends nostalgic charm with modern convenience, offering a rich, creamy, and utterly delicious confection that requires minimal effort and no specialized skills. Whether you're reliving cherished childhood memories or creating new ones, this quick retro microwave delight promises to deliver satisfaction with every velvety bite. So, gather your two simple ingredients, embrace the ease of the microwave, and prepare to enchant your taste buds with this sensational peanut butter fudge – a true classic reborn for today's kitchens.
